Install GitOps Runtime alongside Community Argo CD
Install GitOps Runtime on cluster with existing Argo CD
If you have a cluster with a version of Community Argo CD already installed, Codefresh provides an option to install the GitOps Runtime to co-exist with your Argo CD installation. This option enables you to extend your environment with Codefresh’s GitOps capabilities with a few simple configuration changes, without the need to uninstall Argo CD.
-
Enhance CI/CD with Codefresh GitOps
Dive into the world of Codefresh GitOps, exploring its capabilities and features without having to uninstall or reconfigure existing Argo CD installations. Read about our GitOps offering in Codefresh for GitOps. -
Gradual migration to GitOps applications
After becoming familiar with Codefresh GitOps, make informed decisions when migrating your Argo CD Applications to Codefresh GitOps.For a smooth transition from Argo CD Applications to Codefresh, migrate them at your preferred pace. On successful migration, view, track, and manage all aspects of the applications in Codefresh.
Follow these steps to install the GitOps Runtime on a cluster with Community Argo CD:
- Prepare Argo CD cluster for GitOps Runtime installation
- Install the GitOps Runtime via Helm
- Remove Rollouts controller deployment
- Migrate Argo CD Applications to GitOps Runtime
Prepare Argo CD cluster for GitOps Runtime installation
Before installing the GitOps Runtime on the cluster with Community Argo CD, you need make configuration changes on the cluster.
Step 1: Switch ownership of Argo Project CRDs
If you already have Argo Project CRDs on your cluster, Codefresh recommends doing one of the following:
-
Adopting the CRDs
Adopting the CRDs switches ownership for them to the GitOps Runtime, ensures that the GitOps Runtime manages the CRDs, and that the CRDs are automatically upgraded whenever the Runtime is upgraded. -
Handling the CRDs outside the chart
(Recommended) Adopt all Argo Project CRDs
Adopting all CRDs switches ownership to the Hybrid GitOps Runtime, allowing them to be managed by the GitOps Runtime chart.
- Run this script before installation:
curl https://raw.githubusercontent.com/codefresh-io/gitops-runtime-helm/main/scripts/adopt-crds.sh | bash -s <runtime-helm-release name> <runtime-namespace>
Handle Argo Project CRDs outside of the chart
- Disable CRD installation under the relevant section for each of the Argo Projects in the Helm chart:
--set <argo-project>.crds.install=false
where:
<argo-project>is the Argo Project component:argo-cd,argo-workflows,argo-rolloutsandargo-events.
See Argo’s readme on Helm charts.
Step 2: (Optional) Switch ownership of only Argo Rollout CRDs
NOTE
If you already adopted all Argo Project CRDs, you can skip this part.
You can also adopt only those CRDs that apply to Argo Rollouts. Adopting Argo Rollouts CRDs also switches ownership of the Rollout CRDs to the GitOps Runtime, and ensures that there is only one active Argo Rollouts controller active on the Runtime cluster.
See Argo’s readme on Helm charts.
- Run this script before installation:
#!/bin/sh
RELEASE=<runtime-helm-release-name>
NAMESPACE=<runtime-namespace>
kubectl label --overwrite crds $(kubectl get crd | grep argoproj.io | awk '{print $1}' | xargs) app.kubernetes.io/managed-by=Helm
kubectl annotate --overwrite crds $(kubectl get crd | grep argoproj.io | awk '{print $1}' | xargs) meta.helm.sh/release-name=$RELEASE
kubectl annotate --overwrite crds $(kubectl get crd | grep argoproj.io | awk '{print $1}' | xargs) meta.helm.sh/release-namespace=$NAMESPACE
Step 3: Align Argo CD chart’s minor versions
To avoid potentially incompatible changes or mismatches, ensure that the Community Argo CD instance uses the same upstream version of Argo CD used by Codefresh.
If the chart’s minor appversion is lower than the version used by Codefresh, you will need to upgrade to the required version. For higher minor appversions that are not available in Codefresh forks, please contact Codefresh Support for assistance.
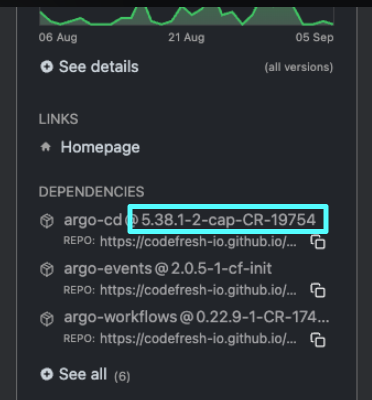
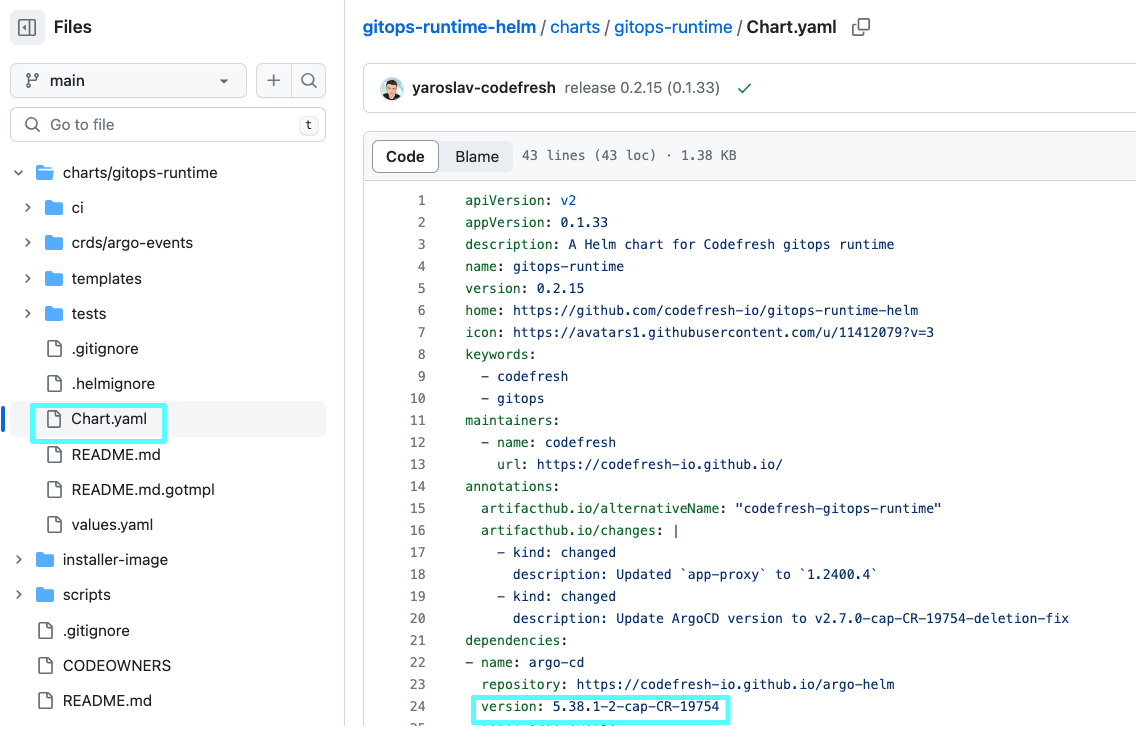
- Get the Argo CD chart version used by Codefresh from the Dependencies either in ArtifactHub or from the GitOps Runtime’s
Chart.yamlin Git:
- Go to
https://github.com/codefresh-io/argo-helm/blob/argo-cd-<dependency-chart-version>/charts/argo-cd/Chart.yaml
where:
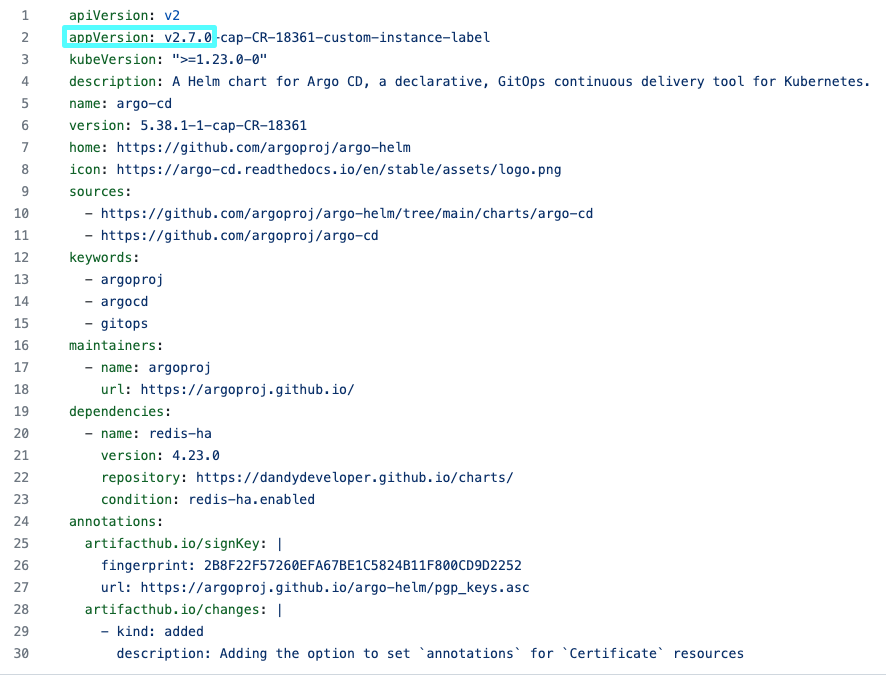
<dependency-chart-version>is the Codefresh Argo CD chart version you retrieved in step 1, for example,5.38.1-1-cap-CR-18361. - Check the
appVersionas in the example below.
- If your minor appversion differs from that used by Codefresh, do one of the following:
- Lower version: Upgrade to the required minor appversion.
- Higher version: If not available in Codefresh forks, please contact Codefresh Support.
Step 4: Set Community Argo CD resource tracking to label
Set Community Argo CD to track resources using the label method. If both Argo CD instances use the same tracking method, it can result in conflicts when tracking applications with the same name, or when tracking the same resource.
- In the Argo CD namespace, make sure
argocd-cm.application.resourceTrackingMethodis either not defined, in which case it defaults tolabel, or if defined, is set tolabel.
Install Hybrid GitOps Runtime via Helm
After completing the configuration changes, you can install the Hybrid GitOps Runtime via Helm.
Most of the steps to install the GitOps Runtime are identical for both types of (clean and alongside Community Argo CD) installations.
Installing alongside Community Argo CD requires additional flags in the installation command for all access modes, tunnel-, ingress-, and service-mesh-based:
-
fullnameOverrideconfiguration for resource conflicts
Conflicts can occur when resources in both Community and Codefresh’s Argo CD instances have the same name or attempt to control the same objects. CustomizingfullnameOverridevalues for Argo CD (and Argo Rollouts if installed) in the GitOps Runtime’svaluesfile prevents these conflicts. -
Resource tracking with
annotation
Installing the GitOps Runtime on the same cluster as Argo CD requires that each Argo CD instance uses a different method to track resources. Using the same tracking method can result in conflicts when both instances have applications with the same names or when tracking the same resource. Setting the GitOps Runtime’s Argo CD resource tracking toannotation+labelprevents such conflicts.
Before you begin installation, review Additional installation flags for GitOps Runtime with Community Argo CD, and then follow our step-by-step installation guide to install the Hybrid GitOps Runtime via Helm.
Additional installation flags for Hybrid GitOps Runtime with Community Argo CD
These are the flags to add to the install command when installing alongside Community Argo CD:
...
  --set argo-cd.fullnameOverride=codefresh-argo-cd \
  --set argo-rollouts.fullnameOverride=codefresh-argo-cd \
  --set argo-cd.configs.cm.application.resourceTrackingMethod=annotation+label \
...
where:
argo-cd.fullnameOverride=codefresh-argo-cdis mandatory to avoid conflicts at the cluster-level for resources in both the Community Argo CD and GitOps Runtime’s Argo CD.argo-rollouts.fullnameOverride=codefresh-argo-rolloutsis mandatory when you have Argo Rollouts in your cluster to avoid conflicts.argo-cd.configs.cm.application.resourceTrackingMethod=annotation+labelis mandatory to avoid conflicts when tracking resources with the same application names or when tracking the same resource in both the Community Argo CD and GitOps Runtime’s Argo CD.
Remove Rollouts controller deployment
If you have Argo Rollouts also installed with Community Argo CD, after confirming successful installation, remove the duplicate Argo Rollouts controller deployment to avoid having two controllers in the cluster.
IMPORTANT
Make sure to remove only deployment and not the CRDs. Removing the CRDs also removes Rollout objects resulting in downtime for workloads.
- Remove the duplicate Argo Rollouts controller:
kubectl delete deployment <argo-rollouts-controller-name> -n <argo-rollouts-controller-namespace> - Continue with Step 8: (Optional) Create a Git Source.
Migrate Community Argo CD Applications to Codefresh GitOps Runtime
The final task, depending on your requirements, is to migrate your Community Argo CD Applications to the Codefresh GitOps Runtime.
Why would you want to do this?
Because this allows you to completely and seamlessly manage the applications in Codefresh as GitOps entities.
The process to migrate an Argo CD Application is simple:
- Add a Git Source to the GitOps Runtime to which store application manifests
- Make the needed configuration changes in the Argo CD Application
- Commit the application to the Git Source for viewing and management in Codefresh
Step 1: (Optional) Add a Git Source to GitOps Runtime
If you have already added a Git Source as part of the Hybrid GitOps Runtime installation procedure, skip this step.
Otherwise, add a Git Source to the GitOps Runtime to which you can commit your applications. A Git Source is a Git repository managed by Codefresh as an Argo CD Application. Read about Git Sources.
- Add a Git Source to your GitOps Runtime.
Step 2: Modify Argo CD applications
Modify the Argo CD Application’s manifest to remove finalizers if any, and also remove the Application from the argocd namespace it is assigned to by default.
- Remove
metadata.namespace: argocd. - Remove
metadata.finalizers.
Below is an example of a manifest for an Argo CD Application with finalizers.
apiVersion: argoproj.io/v1alpha1
kind: Application
metadata:
  name: my-sample-app
  namespace: argocd
  finalizers:
    - resources-finalizer.argocd.argoproj.io
spec:
  project: default
  source:
    path: guestbooks/apps
    repoURL: https://github.com/codefresh-codefresh/argocd-example-apps
    targetRevision: personal-eks
  destination:
    namespace: my-app
    server: https://kubernetes.default.svc
  syncPolicy:
    automated:
      prune: false
      selfHeal: false
      allowEmpty: false
    syncOptions:
      - PrunePropagationPolicy=foreground
      - Replace=false
      - PruneLast=false
      - Validate=true
      - CreateNamespace=true
      - ApplyOutOfSyncOnly=false
      - ServerSideApply=false
      - RespectIgnoreDifferences=false
Step 3: Commit Argo CD application to Git Source
As the final step in migrating your Argo CD Application to a GitOps Runtime, manually commit the updated application manifest to the Git Source you created. Once you commit the manifest to the Git Source, it is synced with the Git repo. You can view it in the Codefresh UI, modify definitions, track it through our different dashboards, and in short, manage it as you would any GitOps-controlled resource in Codefresh.
- Go to the Git repo where you created the Git Source.
- Add and commit the Argo CD Application manifest to the Git Source.
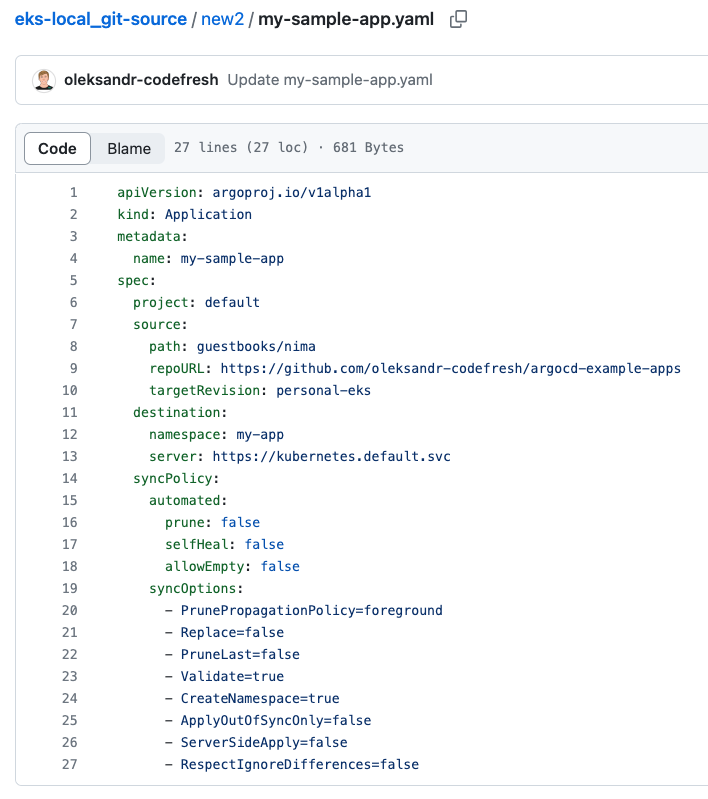
Here’s an example of the
my-sample-appabove committed to a Git Source withoutmetadata.namespace: argocdandmetadata.finalizers.
- In the Codefresh UI, from the sidebar, below Ops, select GitOps Apps. The Applications Dashboard displays the new Git Source application.
- Click the application to drill down to the different tabs. The Configuration tab displays the application’s settings which you can modify and update.
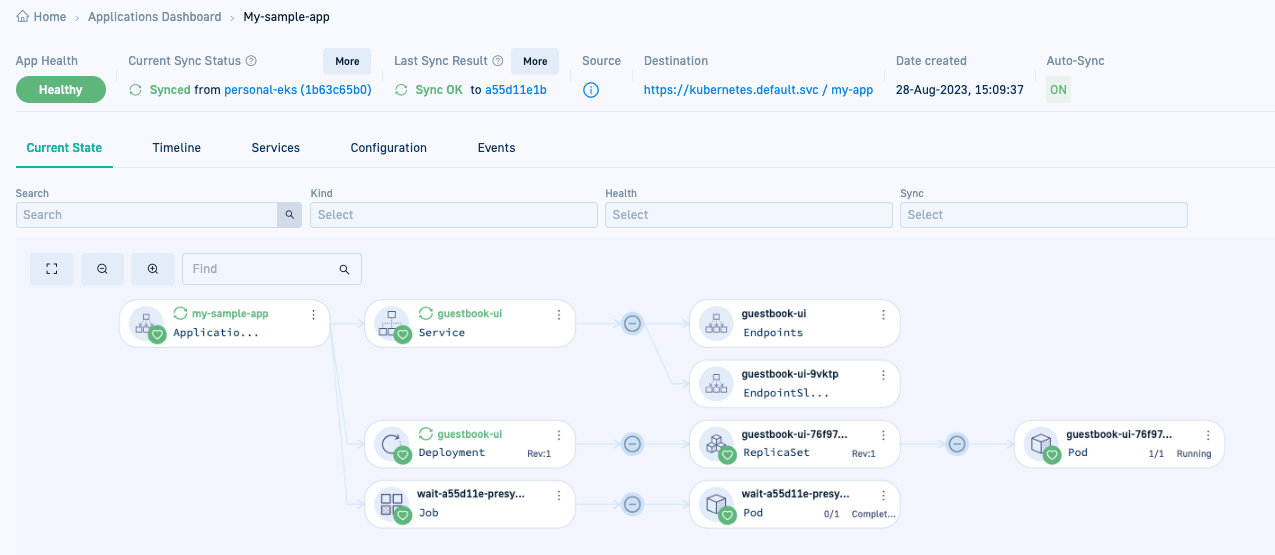
Here’s an example of the Current State tab for
my-sample-app.
Related articles
Creating Argo CD applications
Monitoring Argo CD applications
Managing Argo CD applications
Home Dashboard
DORA metrics
