Helm deployment to Kubernetes quick start
Use the Helm package manager to deploy to a Kubernetes cluster from the Codefresh UI
The Kubernetes deployment quick start showed you how to quickly deploy an application directly to Kubernetes.
The Helm quick start guides you through using Helm as a package manager in Codefresh to deploy to Kubernetes, view the Helm release, and store a Helm chart.
Helm is similar to other package managers (yum, apt, npm, maven, pip, gems), but works at the application level allowing you to deploy multiple manifests together.
Helm offers several extra features on top of vanilla Kubernetes deployments, some of which are:
- The ability to group multiple Kubernetes manifests together and treat them as a single entity (for deployments, rollbacks, and storage). Groups of Manifests are called Helm Charts.
- Built-in templating for Kubernetes manifests, putting an end to custom template systems that you might use for replacing things such as the Docker tag inside a manifest.
- The ability to create Charts of Charts which contain the templates as well as default values. This means that you can describe the dependencies of an application in the service level and deploy everything at the same time.
- The ability to create catalogs of applications (Helm repositories) that function similar to traditional package repositories (think npm registry, cpan, maven central, ruby gems etc).
Codefresh has native support for Helm in a number of ways:
- Easily deploy existing Helm packages to your Kubernetes cluster overriding the default values.
- Easily create new Helm packages and push them to a Helm repository.
- View Helm releases and even perform rollbacks from the Helm Dashboard.
- You can browse Helm packages both from public repositories and your internal Helm repository.
- You can see Helm releases in the Environment dashboard
- You can promote Helm releases with the Promotion dashboard
This quick start will show you how to:
- Deploy a Helm release to your Kubernetes cluster
- View the Helm release
- Store a Helm package inside the integrated Codefresh repository
For reasons of simplicity, we will use the default Docker registry that is set up globally in your Codefresh account. For your own application you can also use any other of your registries even if it is not the default.
Prerequisites
- A Kubernetes cluster in Codefresh
- The Docker registry you connected to your Codefresh account in the CI pipeline quick start
- An application that has a Dockerfile and a Helm chart
- Cluster with pull access to your default Docker registry If you are not familiar, read Manually deploy Docker image to Kubernetes, or read about secrets
If you want to follow along, feel free to fork this repository in your Git account and look at the with-helm branch.
Deploy a Helm Release to your Kubernetes cluster
Codefresh provides a special Helm step that you can use to perform a deployment. We will create a new pipeline with the Helm deploy step and run it to deploy the release to your Kubernetes cluster.
The DeployMyChart Helm step has three environment variables:
chart_namepoints to the chart in the Git repository.release_namedefines the name of the deployment to be created in the cluster.kube_contextdefines which cluster to be used. The name is the same as that of the cluster you added Codefresh Integrations.
The step deploys the Helm chart using the default values as found in values.yaml within the chart folder.
It makes sense to override the defaults using some parameters in the build. For example, instead of tagging the Docker image with the branch name (which is always the same for each build), we could tag it with the hash of the source revision.
The custom_values override the default chart values. The underscores are replaced with dots.
Here we override the name of tag (to match the Docker image built in the previous step) and the pull policy.
- From the Project page, select the project you created.
- Click Create Pipeline.
- Define the following:
- Project: The project is already selected.
- Pipeline Name: Enter a name for the pipeline that will deploy with Helm.
- Add Git repository: Toggle to on. This setting launches the pipeline when there is a commit to the Git repository.
- Add Git clone step to pipeline: Select the repository with the sample application you forked from the list.
- Click Create. In the Workflow tab, you’ll see that the Inline YAML editor already has a sample YAML.
- Replace the existing content in the Inline YAML editor with the example below.
YAML
version: '1.0'
stages:
  - checkout
  - package
  - deploy
steps:
  clone:
    title: Cloning main repository...
    type: git-clone
    arguments:
      repo: '${{CF_REPO_OWNER}}/${{CF_REPO_NAME}}'
      revision: '${{CF_REVISION}}'
    stage: checkout
  BuildingDockerImage:
    title: Building Docker Image
    type: build
    arguments:
      image_name: my-flask-app
      working_directory: ./python-flask-sample-app
      tag: '${{CF_BRANCH_TAG_NORMALIZED}}-${{CF_SHORT_REVISION}}'
      dockerfile: Dockerfile
    stage: package
  DeployMyChart:
    type: helm:1.1.12
    stage: deploy
    working_directory: ./python-flask-sample-app
    arguments:
      action: install
      chart_name: charts/python
      release_name: my-python-chart
      helm_version: 3.0.2
      kube_context: kostis-demo@FirstKubernetes
      custom_values:
      - 'buildID=${{CF_BUILD_ID}}'
      - 'image_pullPolicy=Always'
      - 'repository=r.cfcr.io/kostis-codefresh/my-flask-app'
      - 'image_tag=${{CF_BRANCH_TAG_NORMALIZED}}-${{CF_SHORT_REVISION}}'
- 'image_pullSecret=codefresh-generated-r.cfcr.io-cfcr-default'- Click Save and then click Run twice to run the pipeline.
- Continue with View Helm release.
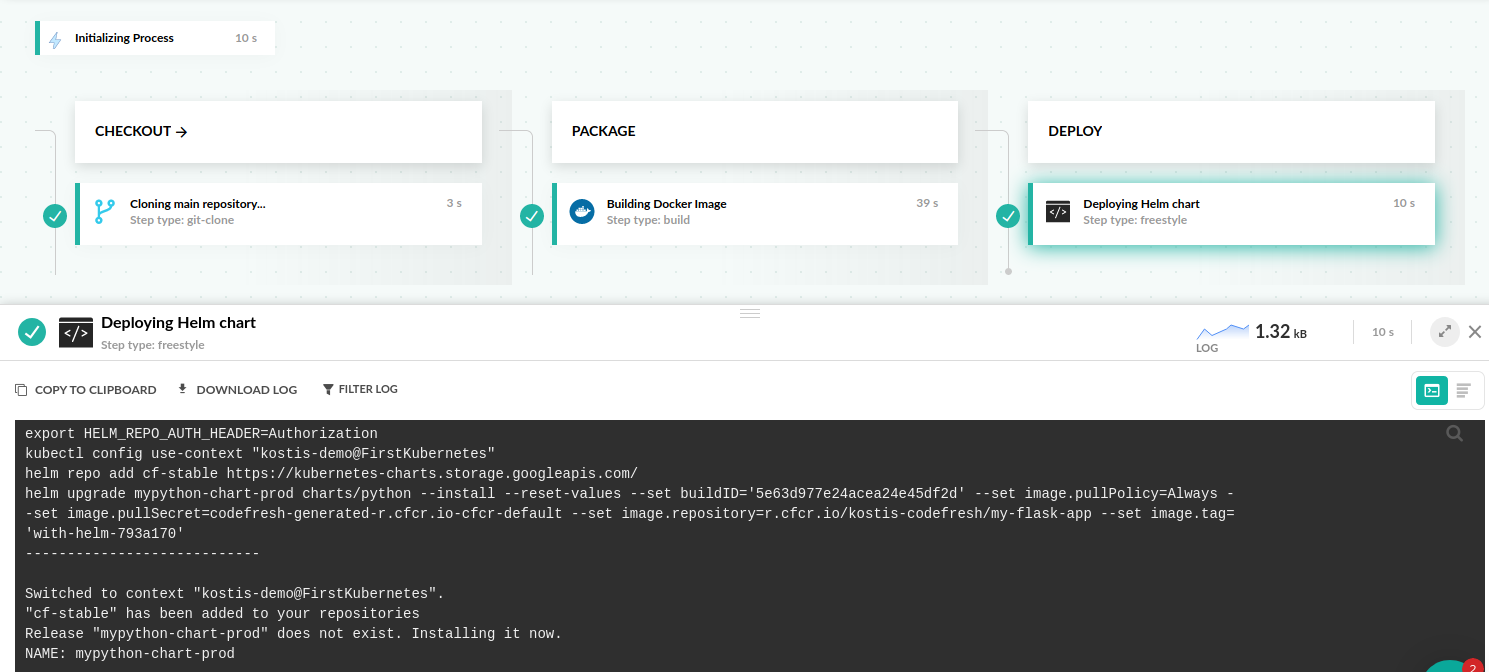
You can see the value replacements in the Helm logs inside the pipeline:
This is the easiest way to deploy to Kubernetes without having to manually change values in manifests. Helm and Codefresh handle the replacements using the built-in steps.
View Helm release
When a Helm package is deployed to your Kubernetes cluster, Codefresh displays it in the Helm releases dashboard.
Before you begin
How to
- In the Codefresh UI, expand Ops from the sidebar, and select Helm Releases. The new release is displayed.
- Click on the release and get information regarding its chart, its revisions, changed files and the resulting manifests.
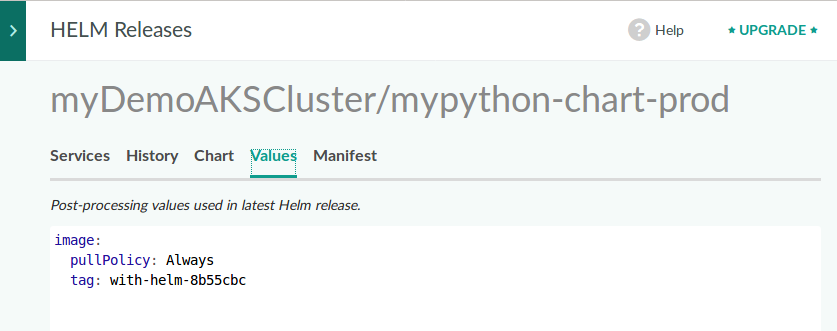
The build values that we defined in the codefresh.yml are shown here in a separate tab so it is very easy to
verify the correct parameters.
TIP
To view the services/pods/deployments that comprise the helm release, go to the Kubernetes Services dashboard.
Roll back a Helm release
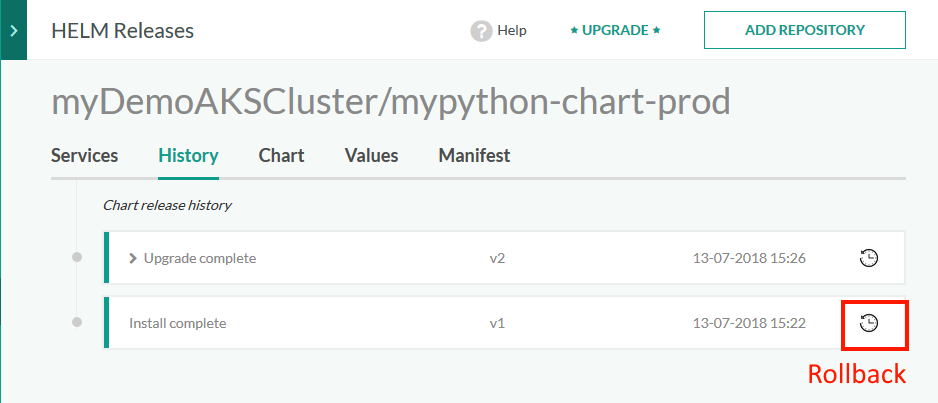
With Helm, you can rollback a Helm release to a previous version without actually re-running the pipeline.
Helm gives you easy rollbacks for free. If you make some commits in your project, Helm retains the same deployment and adds new revisions on it. The server part of Helm keeps a history of all releases, and knows the exact contents of each respective Helm package.
As the rollback creates a new revision, you can move backwards and forwards in time to any revision.
- In the Codefresh UI, expand Ops from the sidebar, and select Helm Releases.
- Click on the release, and then select the History tab.
- From the list of revisions, select one as the rollback target.
Store a Helm chart
Codefresh includes a built-in Helm repository, available to all accounts. Like any other public Helm repository, you can store charts in this repository, and also manually deploy applications from it.
For the quick start, we will modify the pipeline with the Helm deploy step you created in the previous task.
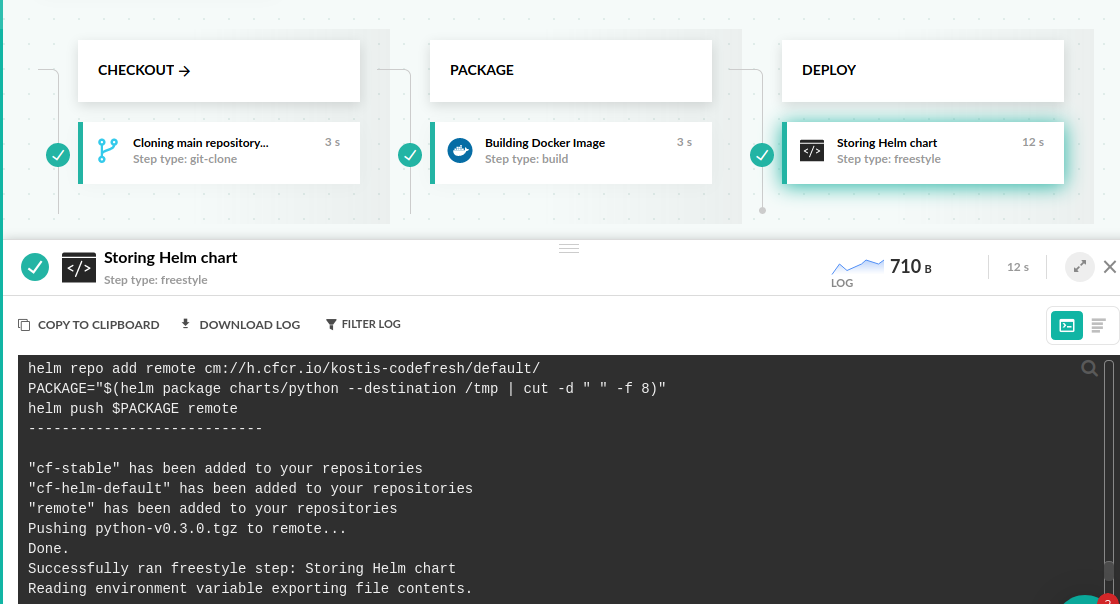
We use the same helm step, but instead of deploying the Helm package which is the default action, we define push as the action. The pipeline now stores the Helm chart in the internal repository.
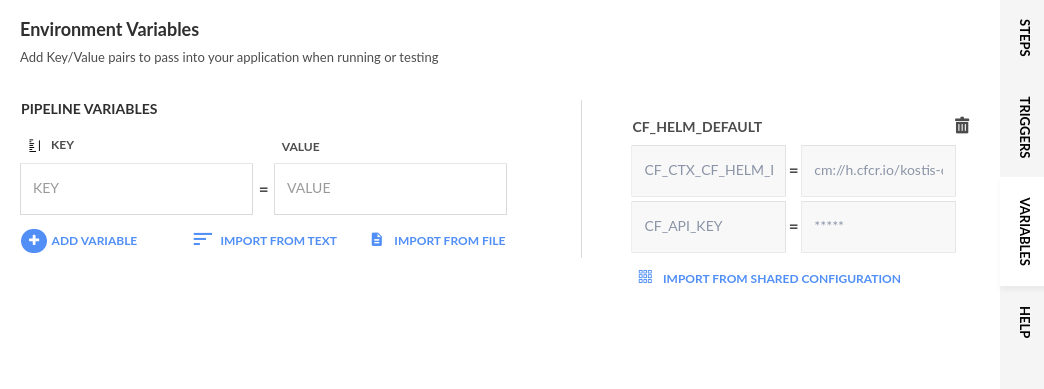
To store a Helm chart, you either need to import the shared configuration that defines the integrated Helm repository, or define the repository URL directly.
For the quick start, we will import the shared configuration.
Before you begin
How to
- In the Codefresh UI, expand Pipelines in the sidebar, and select Pipelines.
- Select the pipeline with the Helm deploy step.
- In the Workflow tab, click the Variables tab on the right.
- From the Variables toolbar, click the context menu, and then select Add Shared Configuration.
- From the list, select CF_HELM_DEFAULT which defines the configuration of the integrated Helm repository, and click Add.
- Go to the Inline YAML editor with the pipeline definition and modify the deploy step in your
codefresh.yml:
YAML
version: '1.0'
stages:
  - checkout
  - package
  - deploy
steps:
  clone:
    title: Cloning main repository...
    type: git-clone
    arguments:
      repo: '${{CF_REPO_OWNER}}/${{CF_REPO_NAME}}'
      revision: '${{CF_REVISION}}'
    stage: checkout
  BuildingDockerImage:
    title: Building Docker Image
    type: build
    working_directory: ${{clone}}
    arguments:
      image_name: my-flask-app
      tag: '${{CF_BRANCH_TAG_NORMALIZED}}-${{CF_SHORT_REVISION}}'
      dockerfile: Dockerfile
    stage: package
  deploy:
    title: Storing Helm chart
    type: helm:1.1.12
    stage: deploy
    working_directory: ./python-flask-sample-app
    arguments:
      action: push
      chart_name: charts/python
      helm_version: 3.0.2
      kube_context: 'mydemoAkscluster@BizSpark Plus'
As you can see, the action argument has push as its value.
- Click Save and then click Run twice to run the pipeline.
- View the pipeline build in the Helm releases dashboard.
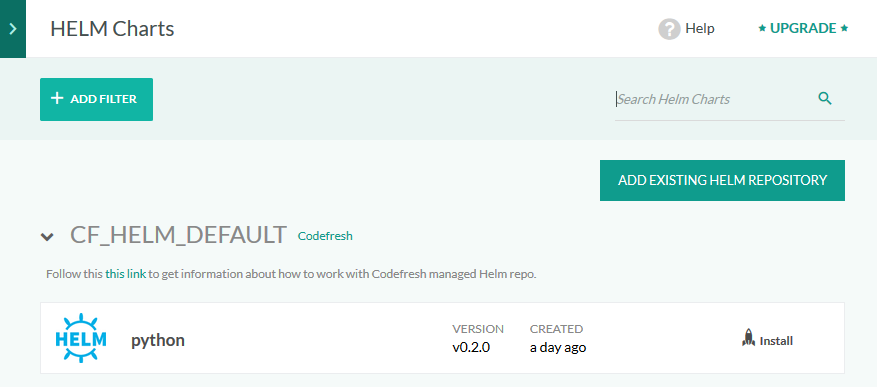
- When the pipeline build completes execution, expand Artifacts from the sidebar, and select Helm charts.
NOTE
You can click the Install button to manually deploy manually the chart. Codefresh will allow to enter your own values in that case and also select your target cluster.
You now know how to deploy a Helm release from Codefresh, view the release, and store the Helm chart in a repository.
Continue with: On-demand environment quick start
Read more on deployments with Helm
Codefresh built-in Helm repository
Using Helm in Codefresh pipelines
Helm pipeline example
Codefresh pipeline definitions YAML
